Wednesday, December 25, 2013

Saturday, December 21, 2013

Year of Foundations: Intro And Sign-Up

It looks like there's a fair amount of interest in my Year of Foundations challenge for 2014, so I'm going to go ahead and make it an official sew-along!  This is the first one I've ever attempted to orchestrate, so bear with me as I muddle through this.  :p


First of all, what is the Year of Foundations?  Quite simply, it is a commitment to creating/assembling one complete set of historical undergarments in one year.

I've decided to keep it rather simple to encourage you to join without feeling overwhelmed.  I'm not going to have any sort of set schedule of deadlines, as your personal goals for this challenge will be different from mine.  I will talk about my own goals in my next post.

Let's define foundation garments.  I have broken it down into categories, with the objective being to complete at least one from each category in order to assemble a complete set of foundations.

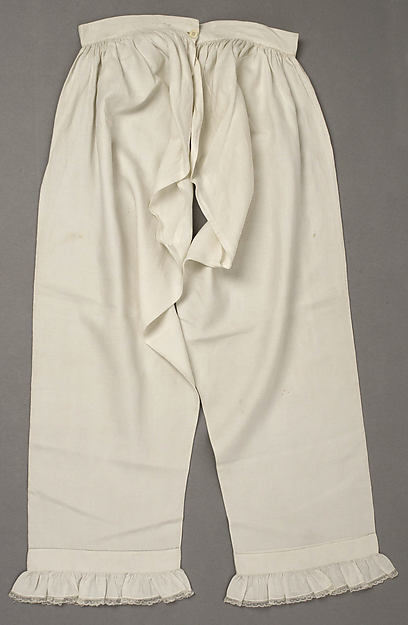
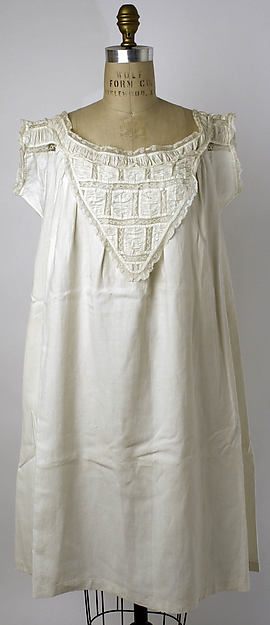
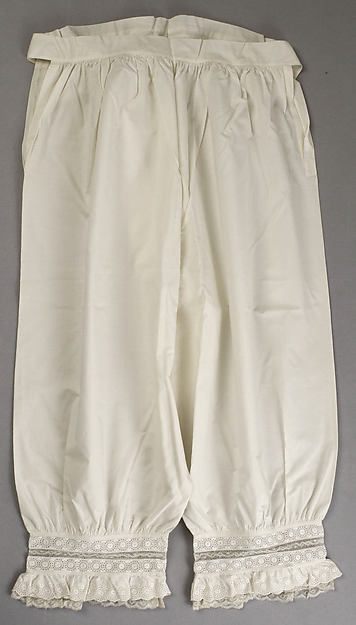
#1 - Basic Undergarments


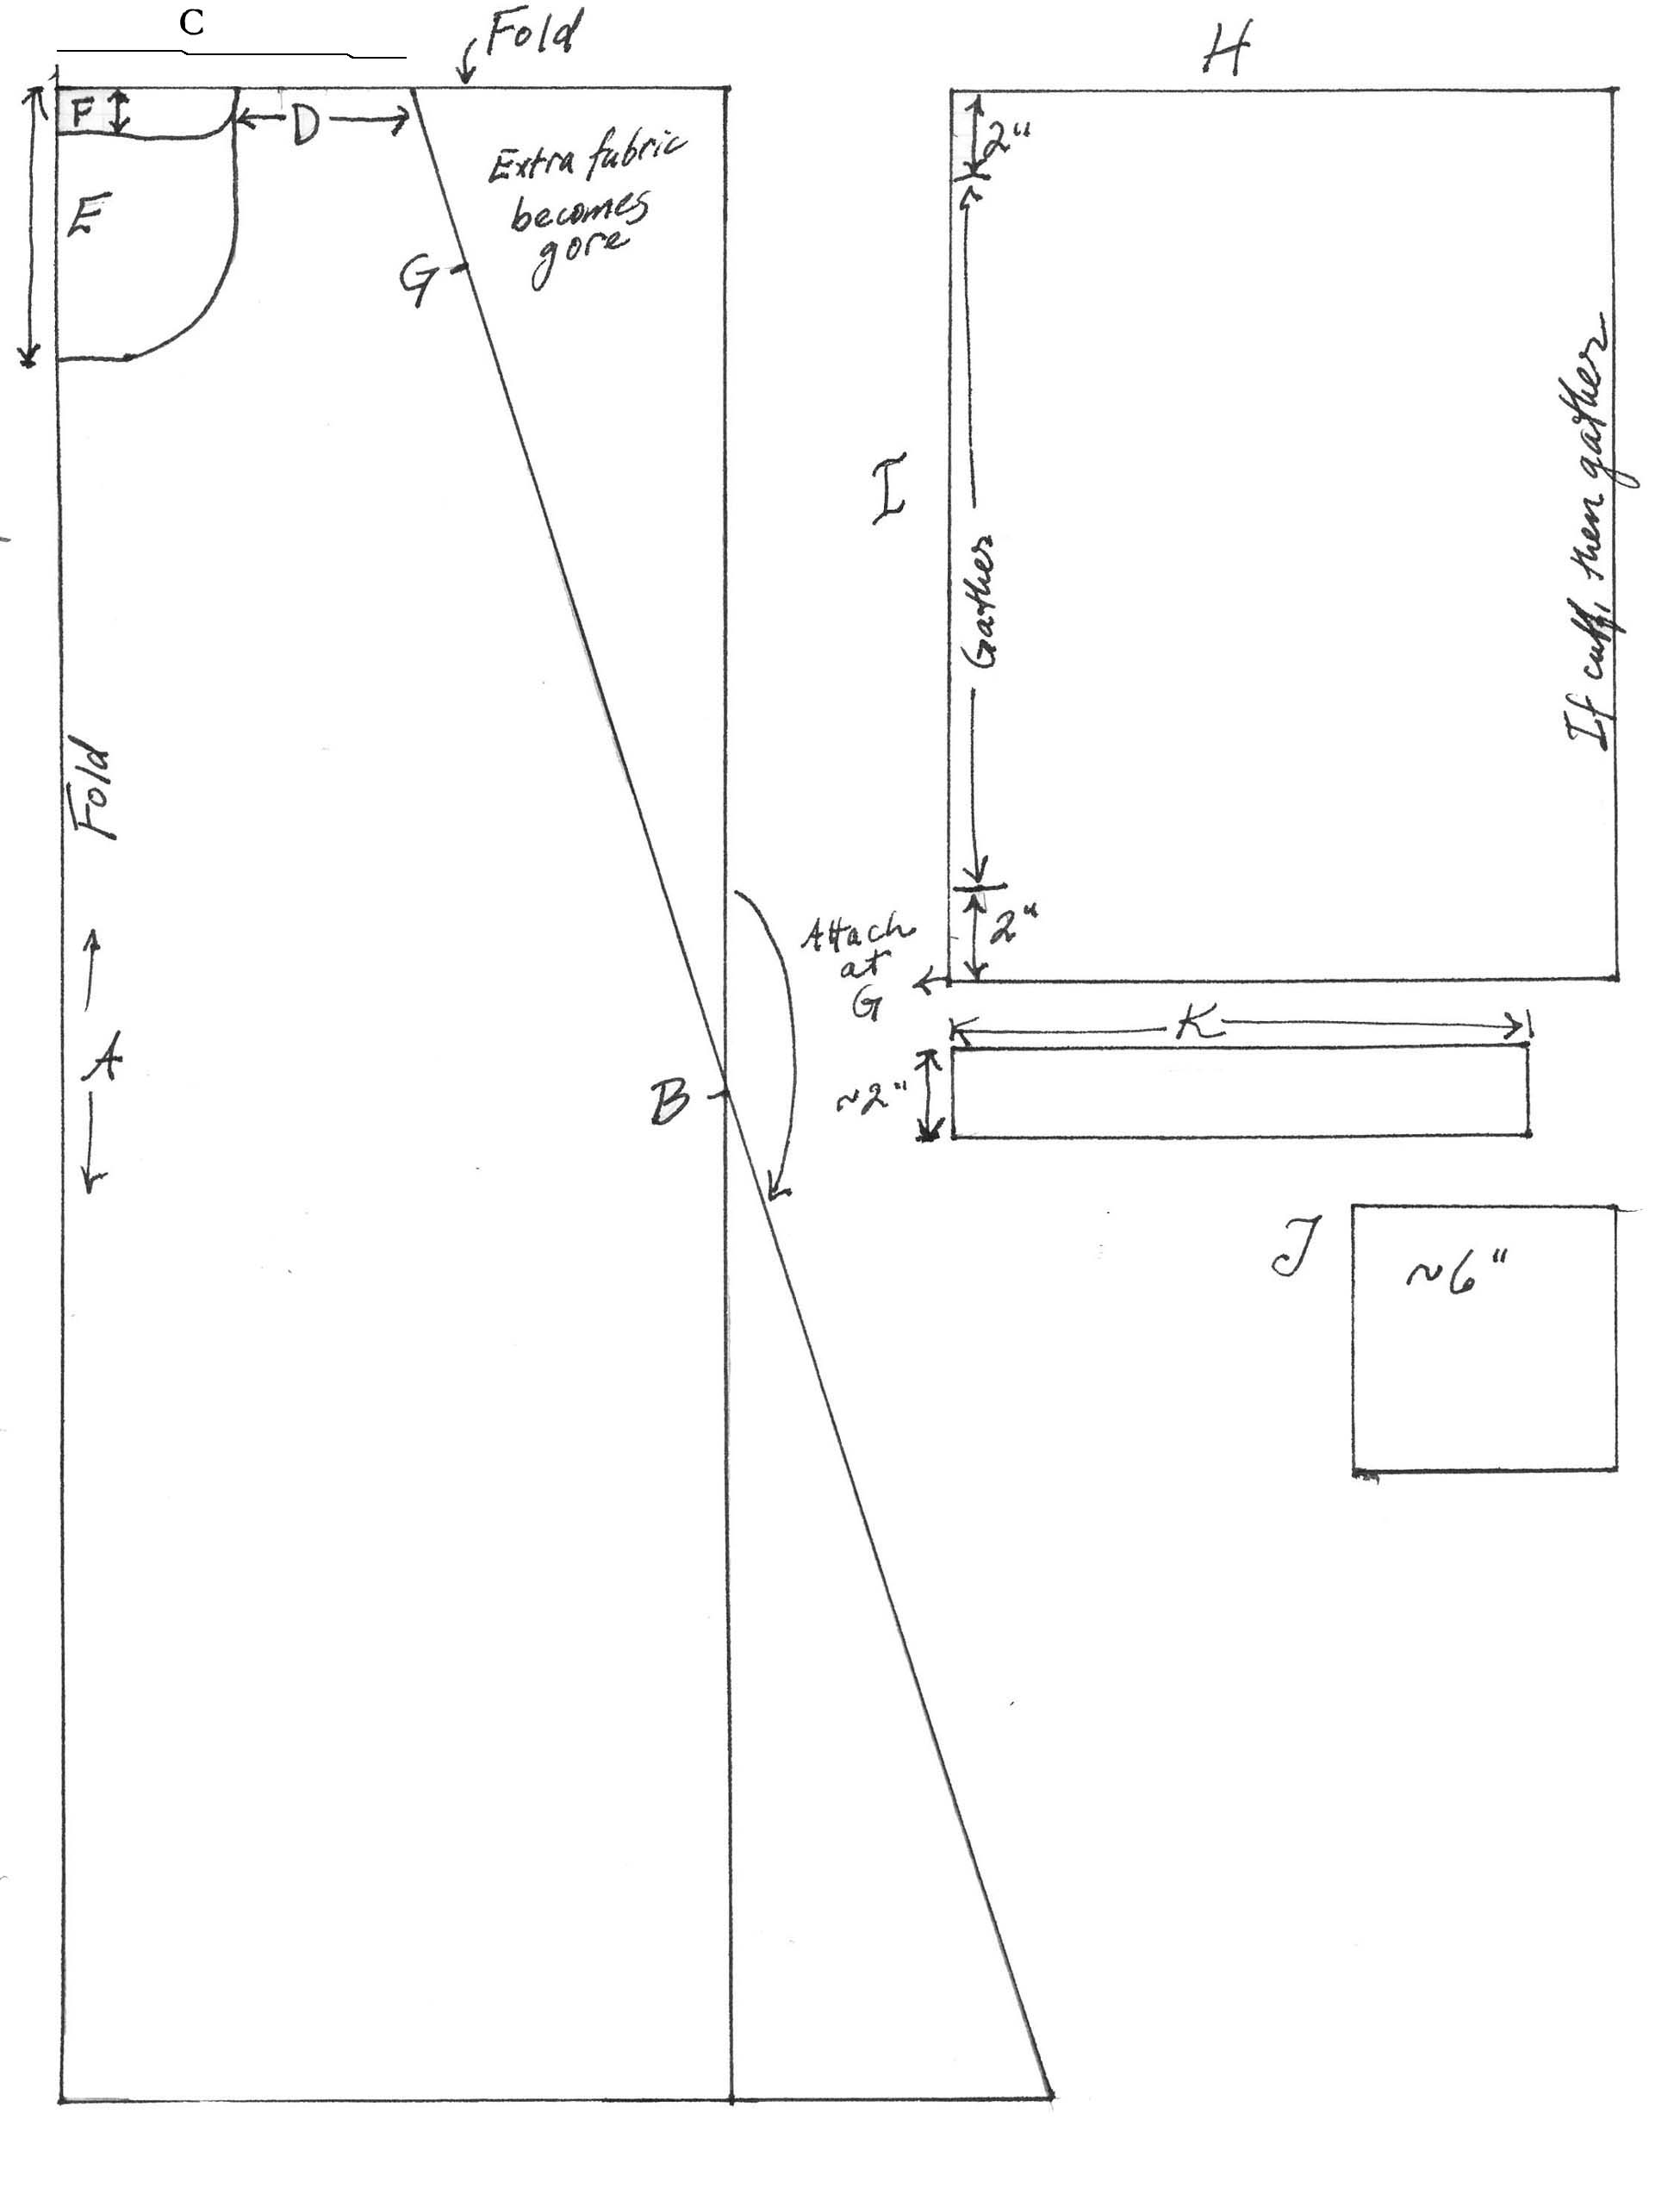
This should be the very first layer of any historical costume, a basic T-shape composed of rectangles and triangles.  Depending on the time period, you can call it a smock, shift, or chemise.  Basic undergarments can also include drawers/pantaloons.  
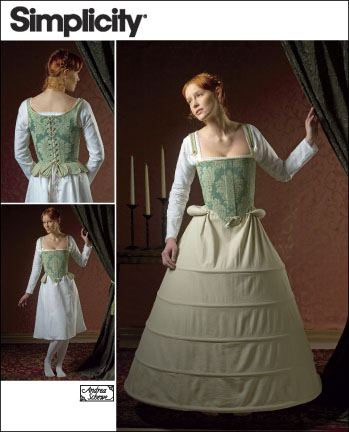
#2 - Bodice Supports


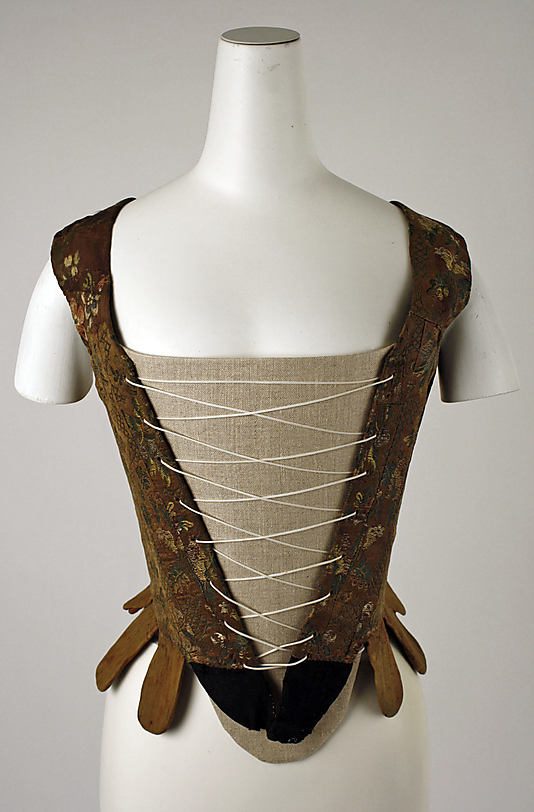
Whether it's a pair of bodies, stays, half-stays, or a corset, every historical bodice from the Renaissance through the Edwardian era requires support and structure to create the proper silhouette.  

#3 - Skirt Supports


Bum rolls, farthingales, hip pads, panniers, pocket hoops, crinolines, bustles - all those lovely wide hips and giant rumps!  The shape of fashion wouldn't be the same without them, and they all conspire to make our waists look smaller.  ;)  

#4 - Petticoats


Petticoats are essential for hiding the bones of your skirt supports and adding extra "floof" at the hem.  You can add as many as you want to give your skirts all the fullness they deserve.  

#5 - Legwear (Optional) 


Hose/stockings and garters could also be considered accessories, but I am counting them as undergarments for the purpose of this sew-along.  After all, a proper lady would never go without them!  (Fortunately for those of us who do not knit, American Duchess stocks everything from 18th-Century silk stockings to vintage nylon seamed stockings!)  


So to participate, all you need to do is challenge yourself to assemble one complete set of foundation garments in the coming year.  You can start from scratch if you're new to historical costuming (like me) and have no proper old-time undies yet - or if you're interested in expanding to a decade of style that you previously haven't explored.  If you are an experienced costumer you can use this year to complete or replace your existing foundations wardrobe.  You can be as ambitious as you want.  Make one pair of embroidered garters or make several full sets of undergarments from different time periods!  It's up to you.  

Leave me a comment with the details of your personal Year of Foundations goal(s):  
  • Time period of focus
  • Number of garments to be made
  • Any inspiration or patterns you wish to share, etc.  
Add the Year of Foundations icon on your own blog, and link back to this post.  


I'll make a list of the participants on my Year of Foundations page, where I'll have links to helpful resources and tutorials as well as all of my posts on the challenge in the coming year.  

(Also, if you have any advice on running a sew-along or if you think of anything that I've missed, feel free to let me know!)  

Friday, December 20, 2013

No New Fabric Challenge - November Recap

11 1/2 months down - two weeks to go!


I know I'm a little late with this recap, but that's because I've been busy working on next year's challenge (among other things)!  But more on that later.

Monday, December 16, 2013

2014: Year of Foundations

Looking back over 2013, I realize that the main thing holding me back from making many of the gorgeous historical gowns I have planned is the fact that I have none of the proper foundation garments for them.  In 2014 I plan to change this.  I'm calling it the Year of Foundations.


My main goal is to complete one full set of historical undergarments from each of at least two time periods in one year.  Should be doable, yes?  Luckily for me, A Damsel in This Dress just posted a fantastic overview of period-correct undergarments from Medieval through Edwardian, and a guide to wearing them properly.  I would definitely recommend checking it out, especially if you are also interested in making 2014 a Year of Foundations!

Saturday, December 7, 2013

Winter Wonderland ...Sort Of

Two weeks ago Brian the Engineer and I set out to Williamsburg to do a photo shoot for the American Duchess photo contest.  It turns out it's hard to come up with photos that resemble "winter" in Virginia, but we did our best.  It was hard to narrow it down to one entry!  This is the one I ended up choosing:


More photos after the break:

Tuesday, December 3, 2013

18th Century Mitts in Progress

After Thanksgiving dinner, I had a sudden urge to get to work on some wool mitts.  I had planned on making them as part of my Christmas card outfit.  I was especially motivated to get them done after spending a few chilly hours in CW for a photo shoot without them!  I had my beautiful muff to keep my hands warm, and my nice wool-lined cloak to protect me from the wind, but of course the cloak doesn't stay closed very well and there was nothing covering my forearms.  So I resolved that the next time I go out in 18th Century clothing in the winter, I'm going to have some mitts!

Let me in, my forearms are cold!  

Sunday, December 1, 2013

The Day of the Doctor!

As an avid Doctor Who fan, I was of course very excited about the 50th Anniversary episode.  Brian the Engineer and I made plans to go see it in 3D on Monday when it was showing in theatres, so I had to make a costume to wear!  I had started an Amy Pond Kiss-o-gram outfit for Halloween two years ago, but never finished it.  

My inspriation
Basically I had assembled all the parts I needed, but never got around to putting it all together.  

Everything I purchased for the costume
I got the hat and the police belt (separately) at a Halloween store, the checkerboard fabric from Joann's, the tie from Hot Topic, and the Amy Pond ID card at a Star Wars convention last year.  I already had a suitable skirt and white blouse, plus a black blouse that I never wear, to make into the vest:  

I got my mom to embroider the "police" patch on her embroidery machine.
I removed the collar and sleeves and bound the edges with bias tape turned to the inside.  I also took the darts out of the front of the blouse, since it was a little tight over the white blouse.


I hated the flashy silver binding and cheap rhinestones on the utility belt and pouches, so something had to be done.

Yay seamripping!  It looks better already.  
Then I made new pouches from some black vinyl in my stash.  I was in a bit of a hurry, so no pictures of the progress on that.  I also cut strips of the checkerboard fabric for the hat and vest.  

And here's the completed costume:  


I told Brian he could be the 9th Doctor, but we have the wrong screwdriver.  

The anniversary episode was awesome, and I had so much fun hanging out with a whole theatre full of Doctor Who fans - many of whom were also in costume!  

P.S.  Message from Jazz:  sxzzzzzzzzzzzzzzzzzzzzzzzzzzzz011111111111111111111111111"
(She walked across the keyboard.)

Friday, November 29, 2013

Green Swallowtail Jacket

I made a quick 18th Century jacket last weekend for a winter-themed photo shoot at Colonial Williamsburg.  I was already planning on making it to complete the outfit I wanted to wear for my Christmas card pictures this year, but American Duchess's photo contest moved my deadline up considerably.  I'll post the pics from the shoot after the contest is over, but for now here are pics of the jacket.


I borrowed the pattern (with permission, of course) from work, and put it together with no alterations.  I'm wearing it without stays, as I still haven't finished the ones I started a year ago.  I did finally finish my shift, though!  I've worn the red petticoat previously for photo shoots featuring my Lowe's curtain cloak, along with the mob cap.  My new muff cover did get a first wearing, though!  So look for those pictures after December 6, when voting is over.

P.S.  Vote for my photo!  It's called "In a holly daze."

Thursday, November 21, 2013

HSF Gratitude Challenge - Smocked Muff Cover

As previously mentioned, I have fallen very far behind on the Historical Sew Fortnightly.  I haven't given up, though!  I knew I couldn't let the Gratitude Challenge pass by without participating.  I owe too much to the online costuming and blogging community.  I know I would not be where I am today without all the help I've been given along the way, both directly and indirectly.

I would like to pay particular thanks, however, to Maggie of Costumer's Guide and Padawan's Guide.  It's the latter website that helped me immeasurably in my early days of making Padmé costumes, before I really got into historical costuming.  So it was only fitting that I again used the Padawan's Guide for this challenge.

A new muff cover of smocked velvet

The Challenge:  #23 - Gratitude
Fabric:  30" black velvet
Pattern:  No pattern, but tutorials from Padawan's Guide and The Fashionable Past
Year: 18th Century
Notions:  1 yd black bias tape, 2 yds black cord
How historically accurate is it?  I haven't been able to find any information on how old the lattice smocking technique is, but muff covers were certainly around in the 18th Century
Hours to complete: The smocking took four hours, and assembling the cover took probably another three.    
First worn:  Not yet, but I'm planning to use it for my Christmas card pictures.  
Total cost:  Stash project!  :D  

Saturday, November 16, 2013

October Accessory - Regency Reticule

Deadlines.  They are not my friends.  You may have noticed that I fell off the Historical Sew Fortnightly wagon somewhere around oh, April.  I made another brave stab at it in August when I finally posted about my Challenge #1 project... which I had finished in June.  Then in September I stumbled across the Accessorizing Head-to-Toe Challenge and immediately decided to take part!  What could be better than more deadlines?!  :p  I completed the first challenge - Hats - by the skin of my teeth, and although I actually started the second challenge - Purses - at the same time, I only finished it this week.  So without further ado, here is my October Entry:  A Regency Reticule.


The Accessory:  Regency Reticule/Purse
Historical Period:  1810-1820ish
Outfit It Accessorizes:  Either my Apron-Front Gown or my Blue Day Dress
Materials Used:  Striped upholstery fabric, satin, muslin lining, cord
Techniques Used:  Hand and machine sewing

Wednesday, November 6, 2013

Costume Design Center Open House

Friday, October 25 was this year's annual open house at the Colonial Williamsburg Costume Design Center, where I work.  From 9:00-4:00 we were open to the public, completely free of charge.  We had dressed all of our mannequins in costumes produced by the CDC, and set up displays of accessories and special projects all over the building.  My job for the day was to demonstrate handmade buttonholes and covered buttons.  I'll blog about my part of it soon, but for now here are all the pictures I took on my break!


Caution:  There are a LOT of pictures!  

Sunday, November 3, 2013

More Hair Adventures

I tried something new with my hair for the Austenland showing, and I am very happy to say it worked!  I was finally able to create perfectly perky little face-framing curls to peek out from under my bonnet brim, which had always been a challenge since I have rather long hair.  


I had debated cutting bangs, especially after seeing Dames a la Mode's recent fabulous Regency hairstyle, but I know me when it comes to bangs.  They just end up annoying me until I grow them out long enough to get back into a ponytail.  Thus began the experiment to simulate short curly locks without actually cutting my hair.  

First, I gathered my materials.  This particular bottle of hair gel has lasted me several years, but the curved bobby pins are new.  It was one of those things that I didn't know I needed until I found them, and they are so much better than straight bobby pins!  (For the purposes of this experiment they don't do anything special, but for normal usage they are fantastic.  I'm just excited about them.)  


So!  I started by sectioning off a very narrow line of hair around the edge of my hairline, and put the rest up in a bun.  I did this while my hair was dry, unlike previous Regency hairstyle attempts.  I decided this would be better, as I only wanted to curl a small portion of my hair, so I wetted one strand at a time with the little spray bottle of water hiding behind the hair gel in the above photo.  Then I added gel to hold the strand together.  My hair curls great with just water, so I don't need the gel to hold the curl, but in this case I wanted the hair to stick to itself because I was folding it in half:


And wrapping it around my finger to make a very tight, short curl:


Then the bobby pins held the curls in place until dry:


And when I took them out they looked like this:


I was very careful when removing the bobby pins to not disturb the curl, but I did have to pin a couple of them up because they started to separate and hang too long on my forehead.  But all in all it seems to have worked!