My first
straw hat refashion was so successful, I couldn't wait to do more! Although in reality, as with everything I do, it wasn't until I had an event (for which I needed to dress myself and three other ladies in Regency attire) that I actually started on them. Sadly, after I had finished two new bonnets, the event was canceled and they were no longer needed. Oh well. They will still be useful, and I have since worn one of them to a later Regency event.
Here's how they both started life:
I bought them at Goodwill. The first one has such a fascinating weave, and I felt it would be a lovely and cool bonnet for the summer season. The second one was one of three identical hats that I considered purchasing, but I decided to just get one for now and see how it worked out. Now I kind of want to go back and get the other two, if they're still there.
Anyway. I started with the open-weave hat. First I removed all of the decorations. The ribbon edging was sewn on with a machine chain-stitch, so it was a simple matter of pulling on the thread in just the right place so it all unraveled:
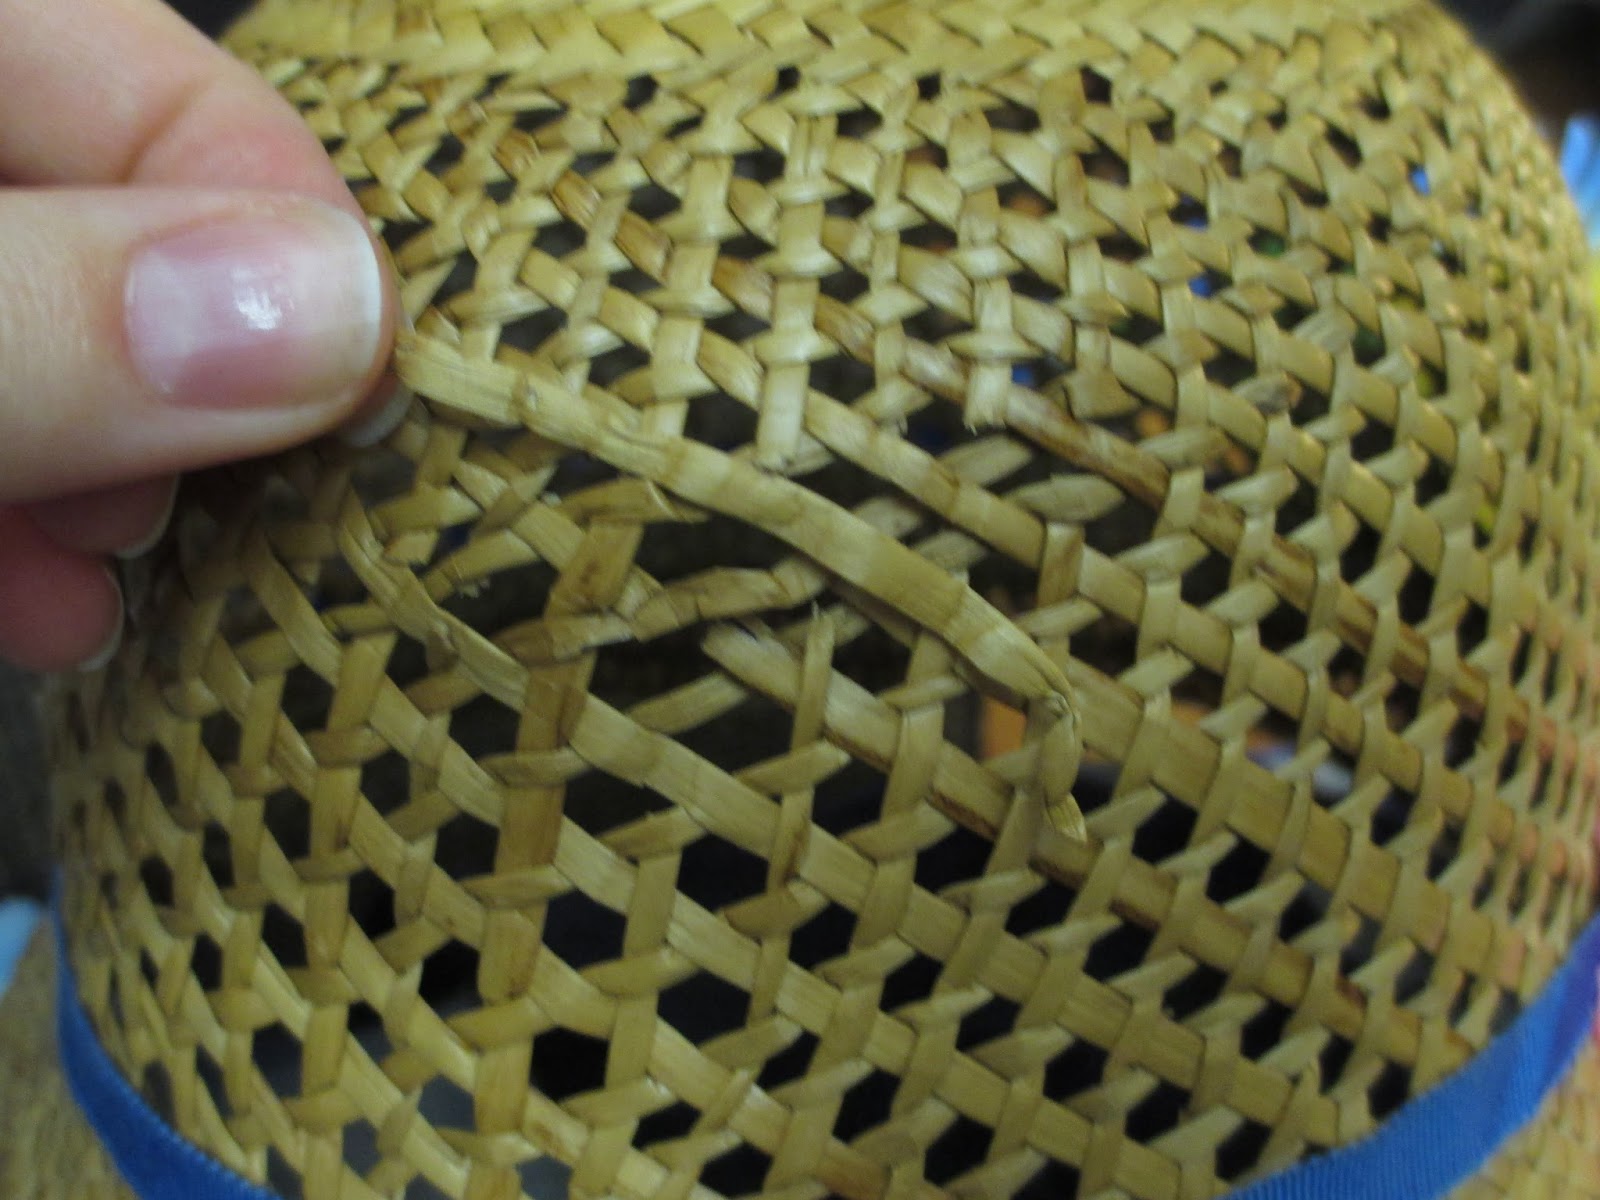
The hat had some problem areas that needed to be addressed, like a permanent dent in the crown, and this hole in the back:
The next step was, of course, to wet the straw.
I soaked the hat in my bathroom sink, inside a Halloween candy bowl:
When it had soaked enough to become pliable, it was time to re-shape the brim. I used one of my new
Hat Shapers to do this, and at the same time to fix the dent in the crown.
 |
| This is the Multi-Way Bell, along with the hat block I purchased on Etsy a while back. |
Because the brim was larger than the form, I didn't press it tightly down, but used the edge as a resting place for the outer edge.
Because of this, the brim is not as smooth as it could be, and has small waves that refuse to flatten. Oh well.
Next I repeated the same steps with the second hat. Only with this one, there were no decorations to remove.
This one I shaped over the bottom of the same Halloween bowl:
I didn't need to re-form the crown at all, as it held its shape really well.
I set the hats outside to dry in the sun. The grill made a handy stand.
"What's that brown fedora," you ask? I'll come back to it in a future post. ;)
Once the first hat had dried sufficiently, I began the most daunting part - trimming the brim down to the shape and size I wanted. I had a very general idea of how I wanted to go about doing this, and I was very nervous that I would wreck the hat in the process.
First I marked the two spots I wanted to cut to with pink pins, to make sure I cut the sides evenly.
I started at the center back and angled in towards the inner band of solidly-plaited straw:
Then the same thing on the other side, stopping each time at the pink pin:
Here is what it looked like after just those two cuts were made:
Next I trimmed out the extra section at the back, because I wanted the finished bonnet to sit on the back of my head without the brim touching my neck:
Then I pulled the cut side sections in to taper the brim in to the back while keeping the outer edge intact:
I pinned these sides in place and tried it on:
 |
| Not bad! |
It needed some fine-tuning, but overall I liked the shape. I fixed this little bubble at the side:
...by extending the cut just a little further and smoothing the transition a little more:
The final shape, pinned in place:
Once again I repeated my steps for the second hat. This one I left a little more at the back of the crown, because I planned to turn it under like the edge of the brim.
The brim on this one had a much less extreme angle in relation to the crown, so it came out differently in the back:
Also, because the weave of this one was same over the entire hat, I didn't need to worry about keeping the edge as intact. I cut off the back of the brim in two sections:
Next I turned in the raw edges and pinned them in place:
The straw was still slightly damp when I did this, so the shape got distorted a bit. I didn't worry about this, as I knew I could just reshape it again later.
Now the original brim edge had been glued, but I did not feel that I knew what kind of glue would be appropriate for this endeavor. I therefore elected to stitch the edges down. It's actually quite simple, if a bit tedious, to invisibly sew through straw. Just make sure the needle always comes up in the junction between crossing strands:
And that the thread follows the path of one of those strands over to the next juncture:
And so on.
I did not turn under the inside edges on either hat, so I needed to do something to keep the cut edges from catching on my hair and coming undone. I carefully stitched a piece of grosgrain ribbon over the cut edges, taking care to keep it from showing on the outside of the open-weave hat:
Lastly, because I had removed the ribbon binding from the outer edge of the brim, I needed something to cover it. I used more of the millinery lace from the first hat refashion, as it was a beautiful color match for this hat as well.
I pinned it so that the scallops of the lace just extended beyond the cut edge of the straw, and stitched it down by hand.
The inner edge of the lace is very malleable, and shrinks down very nicely to fit the smaller circumference it was pinned to.
Oh, one final thing. Remember that hole in the back of the hat? I still needed to fix that.
 |
| (In the meantime I had added a blue ribbon band for decoration.) |
Fortunately I had kept all of the bits that I had trimmed off when I was reshaping the brim. I chose one that had at least two long straws:
And gently took apart the weaving:
Once I had the piece I thought would fit, I wetted it and gently wove it in under the hole:
I added more pieces, interlocking them as best I could to imitate the original pattern, then trimmed away the excess from the inside and stitched them in place:
I was quite pleased with my efforts, and fairly confident that no one would notice the repair unless it was pointed out to them.
Finally, the new bonnets in action, trimmed with flowers!
 |
| (Brian the Engineer brought me back my gorgeous cameo brooch from Italy!) |
Both are comfortable and fun to wear. I added ribbon ties to the open-weave one, but used a hat pin for the solid-weave one. It fits close enough to my head that this keeps it on quite securely.