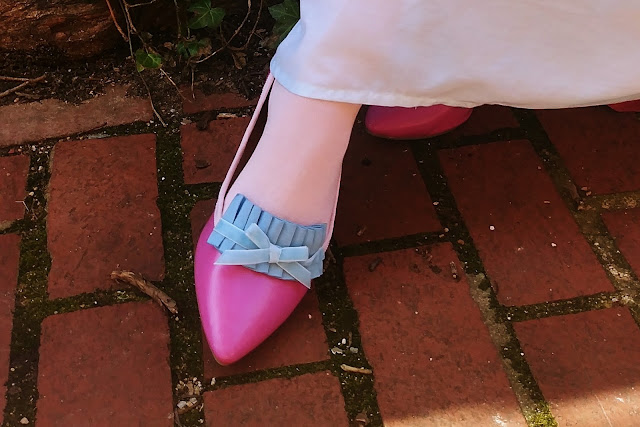
When I was planning my ensemble for the 1790s Tea this past weekend, the first thing I knew was that I wanted outrageous, bright pink shoes! I had originally wanted to decorate this cheapo pair of pointed-toe flats:
to wear with The Mad Dress to last year's Victory Ball, but I ran out of time. Then I decided that the 1790s party was the perfect chance to paint and decorate them! But first they needed some surgery:
I still had my shoe-painting kit from back when I painted my Hartfields, but I knew I was running low on white. I decided to buy some more so I would have enough to mix the perfect pink color, but when I went to the Angelus site to order some, I decided to just buy a pre-mixed pink instead! (I also got more white, and a lovely shade called "Gift Box Blue," which I plan to use for future shoe projects.) I tested the color on the back part of the shoe that I was planning to cut off:
I liked the color as-is, so that was easy! Now to remove the back heel piece. I bent it back to find where the edge of the rigid inner piece was:
That gave me an idea of where to cut.
I further trimmed it to get a smoother back edge.
I tried to make both heels even:
Even though these shoes are not real leather, I decided to treat them as if they were. I figured that way there was a good chance of the paint adhering and staying after it dried. So I used the leather preparer:
I applied the paint in thin coats, as instructed in the American Duchess tutorial. This is after one coat on one shoe:
One coat on both:
Two coats:
I think I did a total of three coats, then sealed them with Satin Acrylic Finisher. I have no photos of this part, but I should mention that I was concerned when I first applied it because it started changing the color of the paint! Similar to when you iron certain fabrics, and they get darker when they're hot. I tried not to freak out, hoping that the splotchiness would disappear as it dried, and to my relief it did! So if you're using the acrylic finisher and run into the same issue, don't worry. It'll return to an even tone after it's dry!
I let the shoes dry overnight, then set about binding the edges with ribbon. I followed (well, remembered) an American Duchess tutorial for this, as well. Actually, I just did the same thing I had done for my Regency Slippers, but I had followed the tutorial then! I did use a different glue this time:
This was not a conscious choice - my FabriTac glue was all dried up, and I thought I would have to run to JoAnn's and get more. But first I searched my stash of glue for an alternative, and found an un-opened bottle of Aleene's Fabric Fusion. It worked great! It's much runnier than the FabriTac, so there was a learning curve, but overall I think it's better for this application. However, these clips are absolutely essential:
Fortunately, the glue dries fairly fast, so I was able to keep moving the clips around the shoe where I needed them, and the ribbon stayed in place beautifully.
I decided to cover the back seam over the top of the edge binding. I just think it looks cleaner:
Oh, I should mention I got my ribbon from Britex Fabrics. They have a great selection of petersham ribbon in multiple colors and sizes. I believe the color I got was Light Pink, and I got a yard each of 3/8" and 5/8" wide.
 |
| Basic shoes ready to go, but not quite ostentatious enough for 1790s. |
 |
| I really must blog about my sewing room one of these days. |
I wanted blue because I was still deciding between two different saris to make my open robe, and the pink shoes with the blue ribbons could go with either one. Also, the throat on these modern shoes is lower than historical examples, and I wanted to make it appear higher. So I pleated it to the width of the throat, tacked the pleats down about 3/8" from the lower edge, and pressed them flat.
 |
| Here the right one is pressed and the left one is not. You can tell the difference! |
However, I was not completely done. The shoes were wearable as-is, so I left them alone and concentrated on my dress, open robe, and stays. Two weeks later, after everything else was finished, I got dressed for the party and had Brian the Engineer take some photos for me:
Then he drove me from our friend's house in Maryland (where we were staying for the weekend) to DC for the party. This gave me half an hour to finish the shoe clips! I had cut pieces of velvet ribbon to the width of the pleated grosgrain, and made bows the night before. I had even treated the cut edges with clear nail polish so they wouldn't fray. All that was left was to sew them in place:
And my shoes were now just as fabulous as I had planned!
So this is the 1790s look. I plan to make more shoe clips to go with different outfits, and I can play with the time period to bring these shoes into the 19th century, as well. So many possibilities!


Your shoes are SO cute and clever! I can't wait to hear about your 1790's jacket. It's truly smashing.
ReplyDeleteThank you!
Delete