Tuesday, June 5, 2018

1785 Swallowtail Jacket - Finally Finished!

At the beginning of May, with limited time before my next 18th Century outing, I decided to finally finish this jacket and add some new accessories to it instead of trying to make a whole new ensemble from scratch. 

When I first made it back in 2014, I ran out of time to add the ruffle at the neck before I wore it for the first time: 

Brian the Engineer took some very nice photos at the time.
Then I never got around to it after the fact.  And I wore it again last April, this time adding a stomacher to accommodate my baby bump: 


I was focused on making sure the ensemble fit, so I also made a very quick and dirty apron to cover the gaps at the sides of my petticoat.  So again, no time to add the ruffle.  But I had set aside a long strip of my block-printed fabric when I first cut out the jacket, because I wanted to recreate my inspiration piece as closely as possible: 

Woman's Linen Jacket, by Unknown Maker, 1785-90  Victoria & Albert Museum
I hemmed the ruffle by hand (though I'm not sure now why I didn't just pink it) and pleated it somewhat by eye to the neckline.  


I did not have time to attach it by hand, however.  I just turned down the top edge about 1/4" and basted it on by machine: 


I can always unpick the basting later and hand-tack it down.  But I am so much happier with the jacket now, and I really enjoyed accessorizing it!  

I had gotten this hat several years ago, and finally got around to decorating it properly: 


I started with sheer striped cotton leftover from my Sheer Striped Regency dress.  I had set aside a yard to make a kerchief for myself before dyeing what was left to make Reptar her own Regency dress someday.  That's not entirely relevant, but I like getting multiple uses out of my fabrics.  I cut a square from the un-dyed yard to use for the kerchief, and then I had a strip about a foot wide left over.  I cut this into several 4" wide strips:  


I marked out eight divisions on the brim, to give myself a guide for pleating.  I pinned the strips along the outer edge in approximately 1" box pleats, then smoothed the pleats in toward the crown as evenly as possible.  I was quite pleased with the results: 


Then I played around with some purple velvet ribbons and one leftover strip of cotton to decorate the crown: 


I managed to make a bow without cutting the ribbon!  I'll do a separate post about that, in case anyone is interested in how I did it.


I rather like the result. 


I had worn this kerchief before un-hemmed and just tucked into my neckline.  But is hemmed now: 

It needs to be pressed, clearly.
 I finished two sides of the triangle with a hand-rolled hem: 


The third side was the selvedge of the fabric, which I left alone because there was no shrinking or stretching when I washed it. 


I made a new apron - I wanted a nicer one than the one I wore last April. 


I also wanted to try the rolled whip gather technique: 
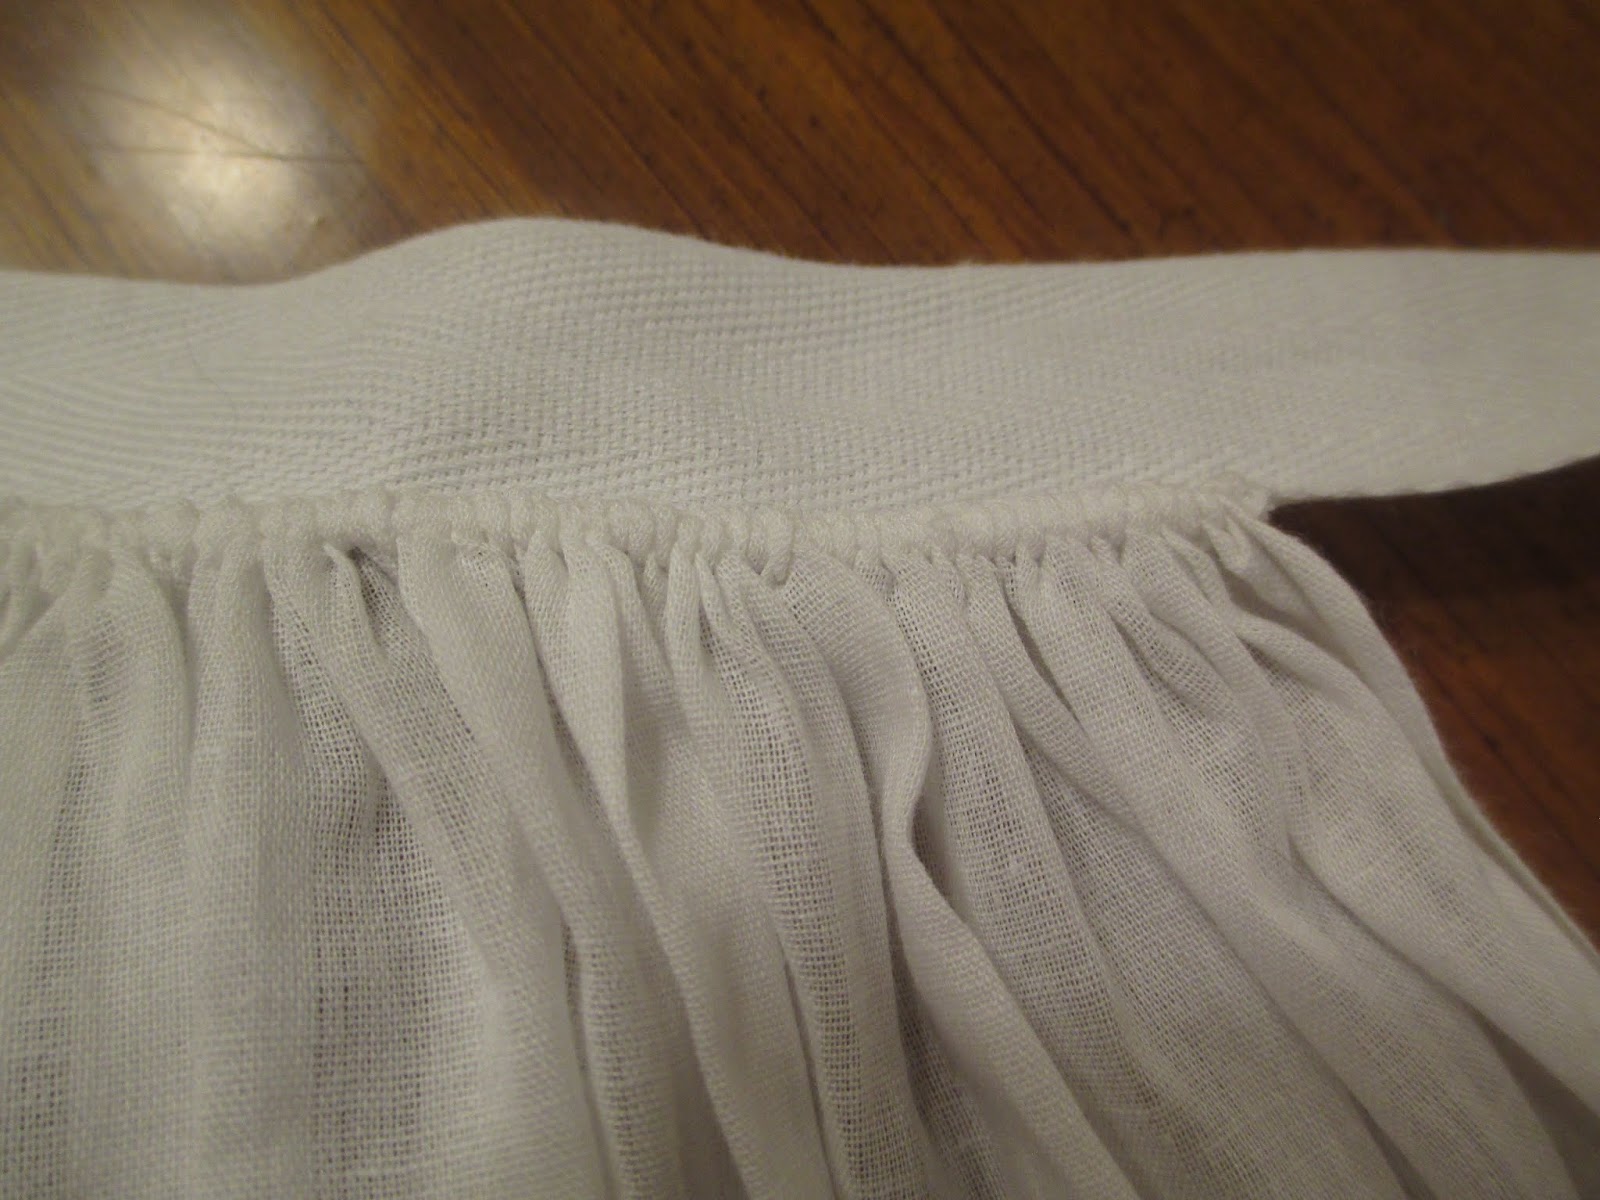

I used the same cotton voile as my kerchief, again leaving the selvedges alone and just hemming the lower edge: 


I also lightly starched the fabric before I made it. 

And finally, I needed a 1785 hairstyle! 

Something like this
I had never before attempted a "hedgehog" hairstyle, but how hard can it be?  I put my hair up in rag curls overnight, and started building the style by pinning large hair rats to the top of my head: 


I then let down the curls, and combed them out one at a time to give them fluff and volume: 


I didn't tease the hair, because I didn't want to make it too tangled, and I wanted to retain the curl as much as possible.  Then I basically just draped them over the rats: 


This part was fun.


At the sides, I tried to keep as much volume as possible, to fill in where there were no hair rats to build on: 


And I kept three or four curls hanging down at the nape of my neck: 


All in all, I was pretty happy with the look I accomplished:  


One really nice thing about the apron is that it hides the fact that the front of the jacket is just a bit too short and tends to show the waistband of my petticoat.  And without even trying, I had gathered the fabric to exactly the width of the space between the two sides of the peplum! 


I think the ruffle really adds a lot to the look!


These photos were all taken after I'd gotten home from the event (and had taken off my bum pads to make driving easier).  Next post will be all of the photos taken in Williamsburg!  

Monday, June 4, 2018

Two Sets of Mitts

This is a catch-up post, as I recently realized that I never blogged about either of these pairs of mitts. 

I made the first pair back in 2016: 


They are linen (I'm 90% sure) lined with silk at the tips. 


I made them from the same pattern as my red wool mitts, this time adding seam allowances to all the pieces. 


These are my summer mitts, which are more for sun protection than warmth. 

The second pair may look incredibly similar, but they are completely different fabrics, pattern, and method of construction: 


These are the mitts that I started in the Mitts, Muffs, and Hoods workshop last February - and finished in December! 


They are entirely sewn by hand, and the method is rather interesting.  You finish the raw edges of each piece before attaching the thumbs to the body, and the lining to the tips. 


It was very interesting constructing them in this way.  But they are very comfortable and warm. 


These are my (for now) best pair of winter mitts, but I plan to make more from this pattern soon! 

Saturday, June 2, 2018

The Hufflebustle - Worn, Not Quite Finished

I have fully embraced the whole "finished, not perfect" mindset when it comes to my costuming.  This is essential, because I so often end up sewing right up to the event in question, and usually have to wear a garment that is pinned in place somewhere.

Case in point:


I wore The Hufflebustle to Carolyn's Victoria Day party on May 19, even though there is a whole list of things I still need to do to fully finish the ensemble.


I need to add boning to the seams on the bodice, which should take care of those unsightly wrinkles on the back.  And I want to take apart the overskirt and line the back piece with stiff netting (a step in the directions that I skipped because of lack of time) to give it more "poof" at the top.


I need to finish fixing my corset by adding a drawstring casing along the top edge of the bust gussets, which should create a smoother line at the front.  And I need to add a ruffle along the hem of the underskirt, because it ended up a bit too short at the back.


I need to add tapes to the interior of the skirts - to be tied over the bustle - which will keep the front and sides nice and smooth while pulling all of the fullness to the back.


And finally, I need to finish sewing hooks and eyes on the bodice front and the overskirt placket.

However, I did not allow the fact that all of this work was not done to detract from my enjoyment of the day!  I had gotten my gown to a wearable state, and I even managed to throw together a decent hairstyle:


My historical hairstyling MO of late is basically putting my hair up in rag curls for several hours (overnight if possible) and then manipulating those curls over strategically-placed hair rats to create the basic silhouette I'm going for.  It has served me surprisingly well.

Though on this occasion, the hairstyle was mainly just to serve as a base for the hat.


Isn't it a great hat?  I commissioned it from Shocking Bad Hats, and it came out so perfect!  We worked from these fashion plates when discussing the design: 


I especially liked the contrast on the underside of the brim on this one.
And from this extant beauty: 


I further accessorized with some vintage gloves that I had dyed yellow several years ago, mainly as a test, but the color was so perfect and matched the flowers on the hat!  The fan is one that I purchased at a costuming exchange but I can't remember from whom, and the shoes are my latest American Duchess acquisition - the Amelie in royal blue. 


I chose blue shoes as a nod to my Ravenclaw tendencies, which I echoed in my Dames a la Mode earrings. 


All in all, I felt very pretty, and had a lovely time wearing my new gown!