The pile of the silk is largely completely worn off at the front of the brim and the edge of the top of the crown. At one spot it has worn through to the base structure:
I do not have the expertise to repair this damage, but I decided that I could fix the underside of the brim, and replace the missing hat band:
I took the hat band from a wool fedora that I had bought at Goodwill, which I had already taken apart and re-shaped. (It's not finished yet, but I'll blog about it when it is.)
The band was slightly too large to fit inside the top hat:
I took it in at the seam so that it would fit:
I added a channel of bias tape to the inside edge of this band, and inserted a drawstring for adjustability:
Setting this aside, I used a scrap of black silk taffeta from my stash to re-cover the underside of the brim.
I marked the edges with a sliver of soap:
Now obviously this scrap was not large enough to cover the entire brim. I would have to piece it.
I marked the edges of the fabric on the brim itself, with the soap:
Then I cut out the silk piece I had traced, giving myself a 1/2" seam allowance:
The section cut out from the middle was just barely large enough to cover the open spot.
I marked the edges again:
I pressed the outer seam allowances under:
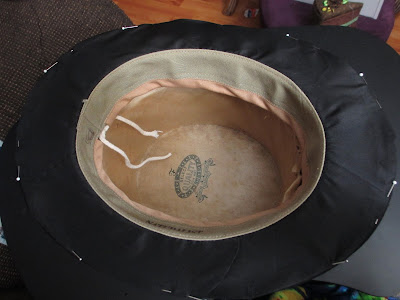
After carefully positioning both silk pieces on the brim exactly where the traced lines matched up, l pinned the edges together:
Then I carefully stitched them together by hand. When the ring was complete, I clipped into the inner seam allowance and stitched the silk to the hat band by machine:
Now all that was left to do was to stitch down the outer edge, which of course had to be done by hand.
I very carefully stitched into the fold of the silk and through the delicate threads of material along the edge of the brim:
When finished, it looked much nicer!
I did end up needing to repair a small cut in the silk brim covering, which you can see here close to the seam:
The new hat band makes it much more comfortable to wear, as well as protecting the hat itself from sweat, dirt, and oils. The new covering on the underside of the brim makes it look much more polished than it did before.


No comments:
Post a Comment