

But I had the itch to make something new! Besides, I had set this fabric aside quite a while ago for a new 18th Century jacket (can you tell I love 18th Century jackets?) and I decided that this was the time to make it finally:
 |
| In its former life, this was a very comfy cotton nightgown that my mom made for me. |

I then washed and dried the fabric, folded it up and put it on a shelf for... about six months. :p I tend to plan garments without any particular event in mind, but then actually start making them about a week before I actually have an event. Not sure why that is.
Anyway, I was a little unsure whether or not I would actually have enough material in this nightgown to make a jacket, but I knew I could piece creatively if need be. But first I needed a mockup. I had three patterns to choose from - the Green Jacket pictured above is one I got from my boss while I was working at the Costume Design Center of Colonial Williamsburg, and fit me beautifully with no alterations. The Block-Printed Jacket is my own pattern, which I drafted based heavily on the same CDC pattern. Both have a swallowtail back:


I wanted a different look for this jacket. And I had a pattern I had not yet used, which I also got from the CDC. This one is for a closed-front gown, but I thought it could easily be modified to be a jacket.
Here is the mock-up:

It was not a perfect fit, as the pattern was actually meant for someone a size smaller than me, but I added about a 1/4" to each seam allowance when I cut out the mock-up. Still, as you can see, the front did not quite overlap enough, so I added an inch to each center front when I cut out the real one.
Now, my dress form (Anna) is not exactly perfectly my size and shape, so I was going for approximate here. But another issue that I've run into over and over with Anna is that the armscye never wants to fit on her, and this was causing weird wrinkles at the sides:

I had a sudden brainwave on how to fix this! I used pins and twill tape to constrain the squishy foam of the shoulder so that it created a smaller "peg" for the arm hole to fit around.

It fit so much better now!


Next the sleeves went on:

 |
| (I also tried it on myself, but there are no photos of this.) |
 |
| Just for funzies. |
 |
| There is a right way up to the design, but fortunately it's not obvious. |


The sleeves were to become the peplum on the back of my jacket. I draped one on the dress form, following the waistline of the mock-up:

I tried a couple of variations, including this box-pleated one, but ultimately decided on the simple knife-pleats above.

However, the sleeve was longer than I needed and also not wide enough. So I cut off the narrower top piece and sewed it next to the bottom and evened out the curve:

Once I had this piece finalized, I traced it onto pattern paper in case I ever want to use it again:

I cut another copy of each pattern piece from plain white muslin, and assembled the bodice using flat-lining construction. The peplum I bag-lined before attaching it to the bodice. Here it is just pinned in place with a sample of the self-trim strips I cut from the remaining scraps:

Here are all of the strips I managed to get, stacked and sorted according to which direction the floral motifs were facing in that row - a subtle difference, but you'll see why soon:

After much trial and error and calculating how much trim I would need to cover all of the edges I wanted, I ended up with this around the neckline:

I box-pleated the strips so that the largest floral motif was on top of each pleat and between each pleat, as well. This proved to be the best use of my limited fabric, and gave a fun effect. I started from the center back seam and used only the right-facing strips for the right side, and the left-facing for the left side:
 |
| It's little details like this that make me happy. |

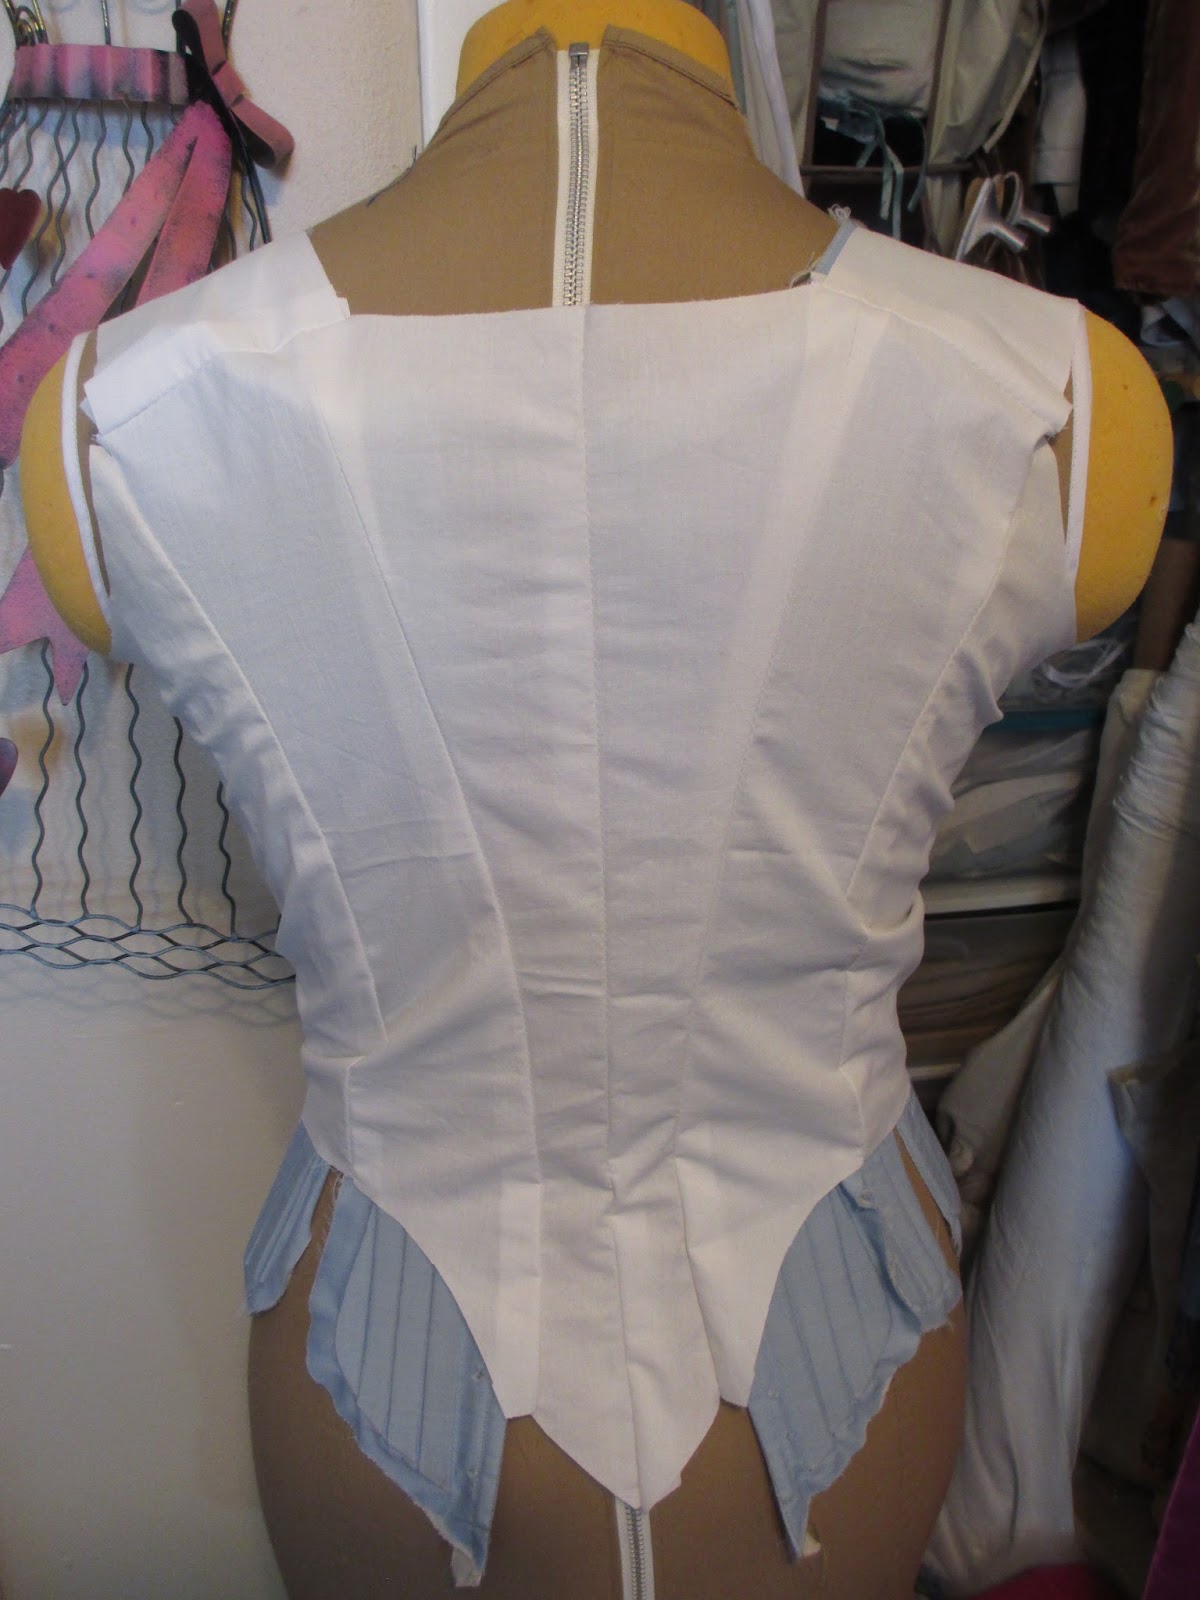
(The neckline, center front edges, and front waist curve on the front bodice pieces are bag-lined before the rest of the bodice is flat-lined. I actually forgot I was supposed to do the same thing with the back neckline, hence the facing at the top there. You can also see the boning channels sewn to the pressed-open seam allowances on the back three seams.)
Next you pleat the skirt (or peplum, in this case) to the width of the waist seam, and either pin or baste those pleats in place.
 |
| You can see here I used the same method of spaced box pleats for a ruffle on the peplum - the only difference is I only stitched it along the top edge, and on the neckline I stitched 1/4" away from both top and bottom edges. |

Cute, huh? I was in love with this jacket immediately.


However, I did feel that the back was just a bit flat. These pictures were taken on the dress form over my mock-stays, an underpetticoat, and my bum roll. I decided that the rather modest bum roll just wasn't cutting it, and that I needed more oomph!
I measured approximately where I wanted to add the extra volume:


And cut a roughly rectangular shape a few inches bigger than those measurements, to account for seam allowances and three-dimensional shrinkage:


Then I broke out a trusty old roll of polyester batting that I inherited from my mother's stash after she started using all-natural batting for her quilts. I cut a strip roughly the same height as the fabric pouch and three times as wide.

Then I assembled the extra misshapen bits along the rounded lower edge, and cut another skinny strip into three, spaced slightly apart:

Then folded up the three layers of the large piece so that all the smaller pieces were enclosed:

I stuffed this bundle inside the pouch:

And sewed the top edge shut:

I pinned through all the layers, in between those three skinny strips:

And stitched two lines down a little over halfway:

I added a twill tape waist tie, and tried it on over the original bum roll:
|
| Before |
 |
| After |
 |
| Baby got back. |

I had enough fabric left after making the petticoat from three panels of the 44"-wide yardage to make an 8" ruffle of approximately 1.5 times the width of the hem. I decided to make Van Dyke points on the ruffle, for some interest.
 |
| Regular readers might recognize the scalloped side of this template from my Francaise Dinner petticoat. |

Which created some fun scraps:
 |
| If I were my mother, I would piece these together to make a tiny, tiny quilt. |


In all other ways, my petticoat followed typical 18th Century construction. I made two waistbands from the strip I cut off at the front, and pleated the front into one and the back into the other. For attaching the ruffle, I used the exact same method as my Francaise petticoat, pinning halfway point to halfway point again and again until I had just enough extra width in the ruffle to make a small box pleat at each pinned midway point.
I don't have any photos of the pinning process, but here it is stitched on:
 |
| Just a quick running stitch by hand - the petticoat itself is hemmed by machine underneath. |


These were taken at Fort Frederick last Saturday, which I will blog about soon. I will also blog about my fun new accessories which I also made during that week of sewing before the event - new linen mitts and a newly-trimmed straw hat! In the meantime, there are more photos of me wearing everything on my Facebook page.