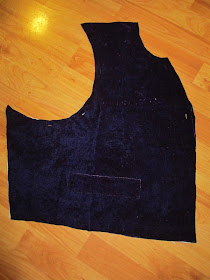
I went and fetched it from my sewing room (it wasn't with the other waistcoat fabric options because I hadn't been considering it for a waistcoat - and I wasn't sure there was enough!) and he said, "Yes. That is my new waistcoat." Well, ok then.
 |
| This is the velvet in question. It's been in my stash so long I can't remember where it came from, but clearly it used to be half of a dress. |
We decided to go with View B this time, without lapels. And Brian wanted fancy gold buttons, so I ended up stealing them from his Blue Linen Tailcoat - but I had been wanting to replace those with self-fabric covered buttons anyway.
The project got put on the back burner for a couple months, during which time I stored the clean velvet folded on a shelf. So when I picked it back up again, it needed to be pressed.
 |
| Jazz helped. |
I cut out the lining first (from 100% linen I was lucky enough to find at JoAnn's) so that I could lay out both front pieces together to get the best use of the fabric. It was a good thing we had already decided to forgo the lapels, because there was just barely enough fabric as it was!
 |
| And this is without the welt pocket pieces and the other three collar pieces shown! |
I was actually very grateful that the pattern directions are specifically hand-sewing instructions, as I've had a miserable time in the past trying to sew velvet by machine. Putting this waistcoat together by hand was MUCH easier! (Not actually easy, you understand. Just relatively easy. :p)
 |
| I apologize for this being my only in-progress shot, but I was - as usual - in a hurry to finish! |
And here's the finished waistcoat:
Velvet is so tricky to photograph - and purple velvet even more so! I've found that purple is one of the most difficult colors when it comes to photography. It never seems to want to show up as the same color as it looks in real life.
 |
| This color is pretty close. |
Close-up of one of the hand-sewn buttonholes:
And here's Brian the Engineer proudly wearing it with his Black Wool Tailcoat (and new linen cravat) at the Trafalgar Victory Ball in October:
The linen cravat replaces the silk scarf that we had been using for his neckwear:
The scarf is 18 1/2" wide by 47 1/2" long, which is not long enough for a properly-tied cravat. I made the linen one 9 1/2" wide by 75" long, and it works much better. Start with the center of the length at the front of the neck, bring the two ends around and back to the front, tie a loose knot, and fluff out one end to cover the knot.
I hemmed the cravat with a hand-rolled hem. It took forever! But it's a fun technique, so I enjoyed it.


What a wonderful outfit!
ReplyDelete